How to Remove Stitches

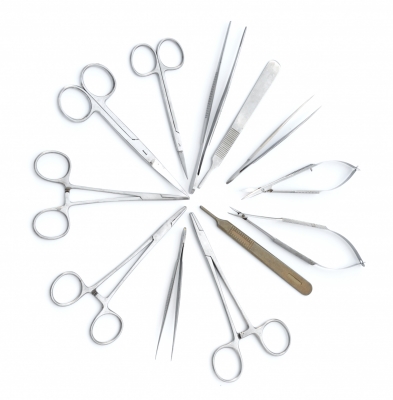
Tweezers and Sharp Scissors
How to Remove Stitches
The medical term for stitches is sutures, and your visit to the emergency room has left you with a few of them as the result of a laceration or wound. It’s been several days since the procedure, and now it’s time to remove them—but how? Most of the time, removing stitches is a very easy procedure that is painless and only takes a few minutes. However, before you start the process of suture removal, there are certain steps to take to ensure safety and to limit the chances of complications. Although it is highly recommended that your physician remove your stitches, it can be done safely if you follow these instructions and take the appropriate precautions provided. Please read all instructions before removing your sutures.
What Kind of Sutures are Supporting the Laceration?
Sutures are made out of silk, cat-gut, plastics, and other kinds of man-made and natural materials. Similar to fishing tackle, sutures are incredibly strong, yet relatively easy to cut. Absorbable sutures are usually used in surgical procedures and dissolve after a period of time. Sutures used for lacerations in the skin are mostly made of non-absorbable material and need to be removed after the sufficient amount of time has passed and the laceration has healed.
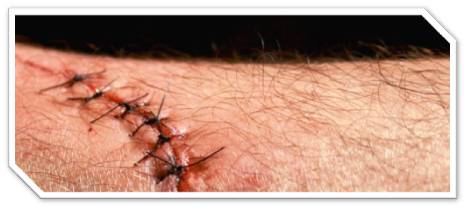
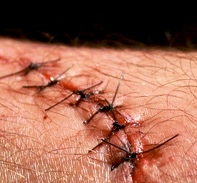
Standard Non-Absorbable Sutures
When You Need Your Doctor to Remove Stitches
If your sutures are the result of a surgical procedure or operation, it’s imperative that your doctor remove them and observe the post surgical area for signs of infection or complications. If your sutures are in a sensitive area, such as— close to the eye area or inside the mouth— you need to have your physician remove the sutures.
Does the Wound Look Infected?
If the wound edges have not healed or show signs of extreme redness and have a red or a yellowish pus type discharge, you need a physician to remove the sutures. Infection will inhibit healing and may stop the edges from growing back together properly. Removing the stitches in an infected or non-healing wound may reopen, bleed profusely, and require further sutures and antibiotics.
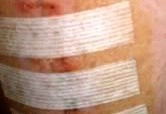
Large Steri-Strips
Count the Knots: Six Sutures
How Many Days old are Your Sutures?
Different parts of the body need sutures to stay in place for optimum healing times. Although your physician has given you the amount of time for your sutures to stay in place, a general idea of healing time is as follows:
· Facial Sutures: 5-7 days
· The Scalp needs: 7-10 days
· Joints: 14-16 days
· The Trunk area: 7-10 days
· Upper and lower extremities: 10-14 days
If the sutures have been in place for a longer period of time, the skin may have begun to grow over them. Do not attempt suture removal if you can’t visualize the sutures and call your doctor for help.
A Guide to Removing Stitches
The Sutures are Dry and the Edges are Healed
Gently wash the wound with a little soap and water to remove any encrusted blood or dried drainage. Pat dry and let air dry for a few minutes. Meanwhile, assemble your equipment and prepare to remove the sutures.
Gather Your Equipment for Suture Removal and Sterilize Them
Although sterilization means to remove all bacteria and viruses, that’s not completely possible in a home environment. Wash all utensils then rinse them in alcohol and allow air drying. This process is sufficient for home use.
1. Small Sharp scissors
2. Tweezers
3. Gauze or clean cotton balls
4. Steri-Strip closures or band-Aids
Locate the Individual Sutures and Gently Pull with Tweezers
Each suture is an individual stitch and can be identified by the knot. For instance, five knots mean five stitches.
1. Clasp the suture with tweezers and pull just enough to clear the skin.
2. Then, insert the scissors and cut the suture just below the knot.
3. Use the tweezers to gently pull the suture from the skin.
4. Repeat the process with the next suture until all are removed
5. If any spaces between the edges of the laceration remain, apply a steri-strip or cut the adhesive part of a band aid and apply to the wound while gently pulling the edges together, and leave on for about three to five days.
Wipe the Area and Keep Dry for a Few Days
After the suture removal is complete, cleanse the area and keep it dry for a few days. Healing will continue and the wound may leave a minimal amount of scarring.
Complications to Observe and Report
Contact your physician if any signs of infection occur: including red streaks or lines at the site, swelling, fever, excessive amount of drainage, redness, or swelling at the site.


